
| Painting&Drawing | Play Dough/Clay | Collages | Crafts |
| HOME | ||
| SPORTS | ||
| BIRTHDAY IDEAS | ||
| ART AND MUSIC | ||
| OTHER ACTIVITIES | ||
| GAMES AND CRAFTS | ||
|
||
| WORKSHEETS | ||
| DAY CARE | ||
| SUMMER CAMPS | ||
| COMMENTS | ||
| LINKS |
|
Follow Toddler-net
|
||||
CRAFTS for KIDs
| Paper cup "flowers". You can make a nice card using cupcake paper cups. Your child can color the cup with crayons, colored pencils, or markers, glue it to a card, and then draw a stem and a few leaves. To make it more interesting you can suggest that your child cut the sides of one cup and glue it into another or glue some other decorations into its center (there are many different possibilities). |
 |
|||||||||
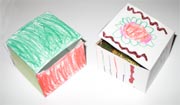
| Paper gift box. It's really easy to make a nice box out of a simple piece of paper. Print out a box layout. Ask your child to color it before cutting it out. To make a sturdier box, trace the printed out shape onto a thicker sheet of paper and then let your child color it. To make it a bit more interesting he can simply color it with colored pencils or markers or else draw some pictures on the sides. Then, help your child cut the shape out and fold it (use ruler to fold thicker paper). Glue the sides together. When the box dries, glue some beads or other decorative items to the sides. |
||||||||||
 |
||||||||||
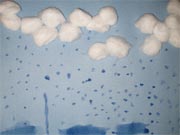
| Cotton balls clouds. Take 10-15 small cotton balls. Pour some white glue into a paper plate. Have your child touch the glue with a cotton ball and press the ball to the blue construction paper. After the "clouds" are ready, suggest that he paint or draw some rain drops and a few puddles with crayons (or markers). |
 |
|||||||||
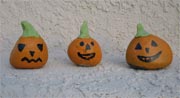
| Baby pumpkins. (click image for detailed instructions) |
 |
|||||||||
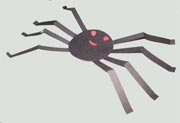
| A paper spider. (click image for detailed instructions) |
||||||||||
 |
||||||||||
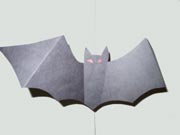 |
Bats. (click image for detailed instructions) |
 |
||||||||
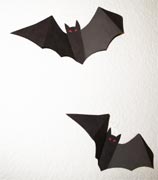
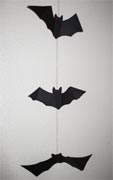
| Bat garland. (click image for detailed instructions) |
 |
|||||||||
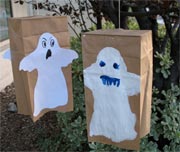
| Paper bag ghost. (click image for detailed instructions) |
||||||||||
 |
||||||||||
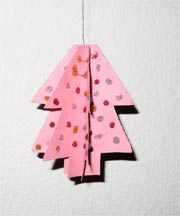
| Paper Christmas tree. (click image for detailed instructions) How to make a decoration in the form of Christmas tree. Easy craft for kids of all ages. |
 |
|||||||||
| A paper ornament with your child's drawings. (click image for detailed instructions) A hand-made Christmas Tree ornament. |
 |
|||||||||
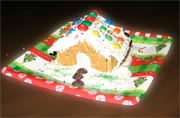
| Little Ginger Bread House (click image for detailed instructions) This small "gingerbread" house is a nice and simple craft for the Christmas season. |
 |
|||||||||
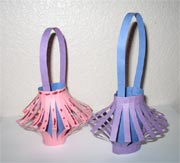
| Paper lanterns. (click image for detailed instructions) Paper lanterns make a nice holiday craft. |
 |
|||||||||
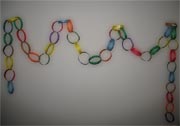
| Paper chain garland (click image for detailed instructions) A simple craft - and a nice decoration! |
 |
|||||||||
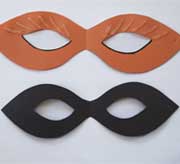
| “Venetian” style masks (click image for detailed instructions) |
 |
|||||||||
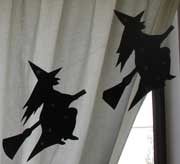
| Witches on brooms garland (click image for detailed instructions) |
 |
|||||||||
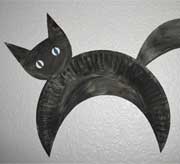
| Black paper plate cat. (click image for detailed instructions) |
 |
|||||||||
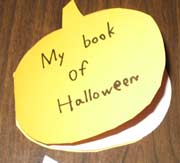
| Book of Halloween. (click image for detailed instructions) |
 |
|||||||||
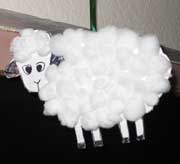
| Cotton Ball Sheep. (click image for detailed instructions) This is a simple sheep craft that is easy and fun to make and it doesn't need lots of materials. |
 |
|||||||||
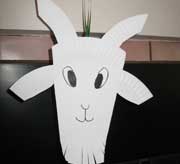
| Paper Plate Goat. (click image for detailed instructions) A simple craft made from paper plate. |
 |
|||||||||
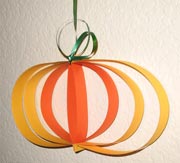
| Paper Pumpkin Craft. (click image for detailed instructions) Easy to make and nice looking craft for children. Can be used as a Halloween decoration. |
 |
|||||||||
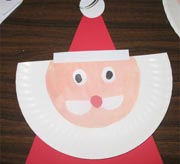
| Paper Plate Santa. (click image for detailed instructions) Nice looking and fun paper plate craft. Good for Christmas. |
 |
|||||||||
Copyright 2009 Toddler-net.com
webmaster@toddler-net.com